Recently engaged? Congratulations!
Expecting a proposal and trying to jumpstart the planning process? There’s nothing wrong with that either!
Planning your wedding day is exciting, but it’s also a lot of work.
So what is the best way to get your wedding ideas in order? How about a DIY wedding binder planner?
Whether you’re having a small, intimate wedding or a huge celebration with hundreds of guests, a wedding binder is essential to creating a plan and staying organized.
Today, we’re talking everything you need to know about how to make a DIY wedding binder planner for your big day. This step-by-step guide will save you a ton of headaches while you plan your dream wedding!
Step 1: Gather Your Supplies
Before you can start building that binder, you’ll need to get your supplies together. Just head to Target or your favorite craft store to find everything you need:
- Binder
- Paper
- Divider tabs or folders
- Sticky notes
- Clear sheet covers
- Pens and highlighters (the more colors the better)
Obviously, the binder itself is the most important part. Pick a cute one in a pretty print or, better yet, get one with a clear front cover so that you can customize it yourself.
If you’re obsessed with planning your wedding (and what bride isn’t?), there’s a good chance this binder will be attached to your hip until the moment you say, “I do.” So, design the outside however you want - you’re going to spend quite a bit of time looking at it!
Also, be realistic about the size. If you’re already pouring over wedding magazines and collecting brochures from vendors, you’re probably going to need a bigger binder...
Step 2: Set Up Your Binder
Now that you’ve gathered your supplies, it’s time to start assembling your book.
Start by adding a cover insert with a fun design that includes the names of the bride and groom. If you’ve already set a wedding date, you can add that too.
Use your dividers to create sections for all of the most important categories. A typical wedding planner binder has sections like:
- Guest list
- Invitations
- Venue
- Wedding dress
- Bridesmaid dresses
- Groom’s attire
- Vendors
- Registry
- Wedding party contact information
- Wedding rehearsal and rehearsal dinner
- Ceremony
- Reception
- Honeymoon
If you’re part of the Marie Kondo cult, you can show off your expert organizational skills by adding sub-dividers within each section.
In the “reception” tab, for example, you can have subsections for: decorations, food, and cake. Under "vendors," you can create subsections for your photographer, florist, and DJ. Organize your sections and subsections however you like - you’re probably the only person who’ll ever look at this book.
Some brides find it easier to give the photographer, florist, and music/entertainment their own tabs. Some even go as far as creating a section for every individual element. If you want to be extra-organized, you can create separate tabs for everything from the bridal party gifts to the thank-you notes.
Add lined paper to each divided section. That way, you can make notes while you plan.
Include a few folders or clear sheet protectors into each section, too. This gives you a place to hold important documents for safekeeping. (You don’t want to be the bride that runs into an issue with a vendor and can’t find your receipts).
Step 3: Start Adding Important Info
Now that your binder is organized, it’s time to start filling it up!
Place the most important info in the front of the book. We suggest starting with a calendar and a wedding planning checklist like this one from The Knot.
Your budget should also go toward the front of the binder. Planning a wedding can get really expensive, so keep a close eye on your budget throughout the entire process!
This wedding budget worksheet makes it easy to outline a budget. It even points out how much money you can spend on each aspect of your special day.
Step 4: Fill It In As You Go
In the early stages, use your binder to store ideas and inspiration. The further you get into the planning process, the more specific your binder should become.
It’s easy to overload your book with to-do lists and business cards from every photographer and florist in town. And that’s okay, as long as you keep your binder neatly organized along the way.
As you add new pages, make sure to put things where they belong. For example, when you’re shopping for venues, keep all of your information in the “venue” section.
Once you choose a location, remove all the info from all the venues you passed on. Throw it away so you don’t overload yourself with useless scraps of paper. If you don’t, you’re likely to find yourself with a binder too heavy to carry around town!
Step 5: Incorporate Your Digital Inspirations

Let’s be real here, what bride-to-be doesn’t have a wedding board on Pinterest? How about Excel spreadsheets full of venues, vendors, and guest lists?
That’s what we thought.
It’s going to be 2020 before you know it, so it would be crazy to think that people are planning weddings without some digital assistance.
The easiest way to keep your physical and digital assets cohesive is to periodically print out your spreadsheets (like the guest lists, budgets, etc.) and add them to your binder. If you make additions on paper, make sure to copy them over to your spreadsheets when you get the chance.
The same goes for your Pinterest boards. We don’t suggest printing out everything you’ve pinned, but choose some favorites and incorporate them just like you would a magazine cut-out.

Don’t like the idea of using all that ink and paper? You could also create QR codes that link to your various Pinterest boards and spreadsheets and print those out. With a QR code in your wedding binder, you can quickly scan the code with your phone to access some online inspiration.
For more wedding planning tips, check out our blog: Bridesmaids Buzz
Other Tips to Make Your Wedding Binder Work for You
A wedding planning binder should make your life easier. If it starts to feel like a burden, you’re doing something wrong.
The most important thing is to keep your planning book organized at all times. But, there are some other tricks that you can do to make yours even more helpful.
Here are a few suggestions:
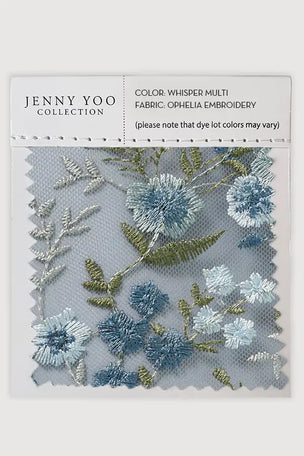
- Include envelopes or zipper pouches. These will come in handy for carrying color swatches, size charts, fabric samples.
- Keep sticky notes on hand at all times. That way, you can flag certain pages to leave reminders to yourself.
- Don’t be afraid to ask for help! Your bridal party is there to support you. If they’re not helping, they’re not doing their job! Delegate some tasks to other people so you can take some things off your plate.
Make it Fun, But Make it Useful
Planning a wedding should be fun! But that doesn’t mean it’s easy. Having a well-designed binder by your side can save you a lot of headaches.
Make it beautiful, because you’ll probably carry this thing around until the day of. Decorate it how you want, but be sure to keep it neat!
With an organized wedding binder, you can streamline the planning process and keep all of your thoughts in one place.
Your wedding day may be your only chance to gather all of your family and friends in the same place at the same time. So whatever you do, be sure to make the most of it every step of the way!


